Once you have booked your Live Observing slot, you will need to plan what objects you want to see. Our list of suggested targets is a great place to start and gives all the information required.
But how will you gain access and be able to control the telescope? The sections below offer step-by-step instructions detailing the process right from the moment you book your slot.
- Confirmation Email
After booking your Live Observing slot, you will be sent a confirmation email.
This is the first of 2 emails you will receive.
- Observing Token
- Image
 CreditThis work by The Schools' Observatory is licensed under All rights reserved
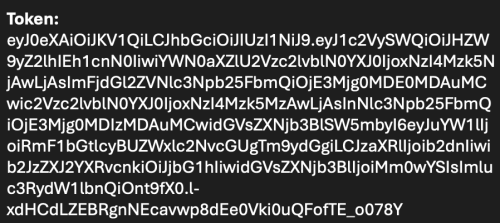
Example of an Observing Token Before your session, you will receive a follow-up email with your observing token for the slot you have booked.
This token is a long chain of random characters and is required to access the Real-Time Interface – the webpage that allows control of the telescope.
- Access the Real-Time Interface
Visit https://rti.lco.global.
Image CreditThis work by Las Cumbres Observatory is licensed under Creative Commons Attribution Non Commercial 4.0 International
On the day of your session, the observing token will become active five minutes before your start time. Input your observing token (just copy and paste it into the box). Then click ‘BEGIN SESSION’. Remember – you will only be able to do this 5 minutes before your session. If you see an error message, check your timeslot.
This will load the Real-Time Interface webpage.
- Navigating the Real-Time Interface
The Real-Time Interface allows you to control the telescope.
Image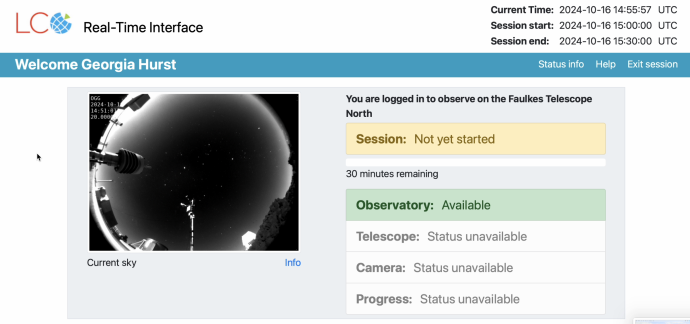 CreditThis work by Las Cumbres Observatory is licensed under Creative Commons Attribution Non Commercial 4.0 International
In the top right-hand corner, you will see the ‘Current Time’ and the times for ‘Session start’ and ‘Session end’. These are all given in Coordinated Universal Time (UTC), so may not match your time zone.
Below this is a grey box containing a live webcam video of the sky above the telescope dome. You will also see the name of the telescope, how much of your session is remaining, and other information about the telescope and camera.
Before your session start time, a lot of these fields will say ‘Status unavailable’. They will change to green as soon as the session begins.
Below this is where target information can be selected or inputted. There are two modes; Manual and List. These will be detailed in a later section.
Image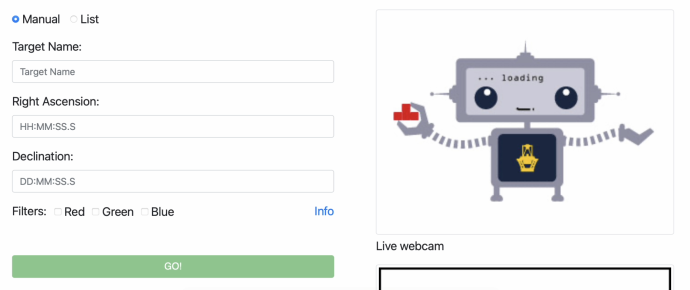 CreditThis work by Las Cumbres Observatory is licensed under Creative Commons Attribution Non Commercial 4.0 International
The ‘Live webcam’ feed comes from one that is placed on the end of the telescope and shows a portion of the sky above it.
You will also see ‘Most recent image’. The last image taken by the telescope will appear in this box. Before any images are taken, this is what will be displayed.
Image CreditThis work by Las Cumbres Observatory is licensed under Creative Commons Attribution Non Commercial 4.0 International
At the bottom of the page is where the data files (images of your objects) will be shown as they become available throughout your session.
Image CreditThis work by Las Cumbres Observatory is licensed under Creative Commons Attribution Non Commercial 4.0 International
- Preparing Your Observation
Though the telescope cannot be directed by you before your session begins, you can fill out information boxes in preparation and be ready to click ‘Go’ as soon as the time is right!
- Selecting a Target: Manual and List Mode
In the area where you can input target information, you will see two options to choose between – Manual or List.
Manual mode will look like this:
Image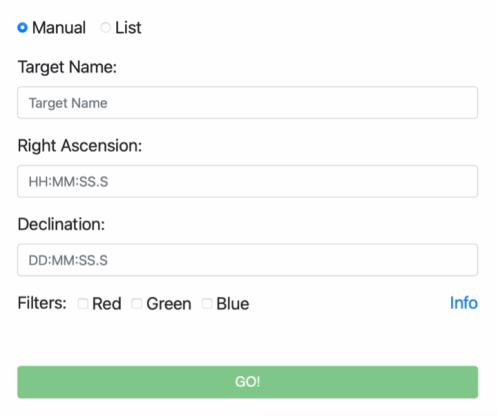 CreditThis work by Las Cumbres Observatory is licensed under Creative Commons Attribution Non Commercial 4.0 International
You will need to input the target name, right ascension, and declination. Then select each filter. This will then allow you to input the exposure time for each filter. These 3 images are taken simultaneously (no matter which mode is selected), so you won't need to wait separately for each one.
Image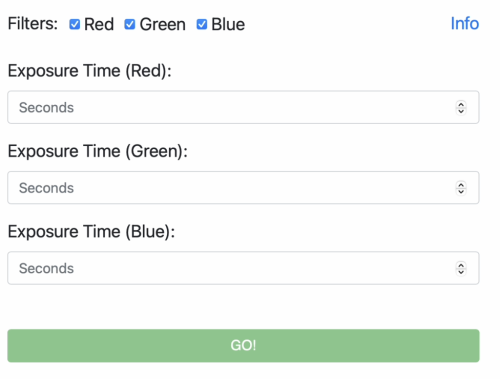 CreditThis work by Las Cumbres Observatory is licensed under Creative Commons Attribution Non Commercial 4.0 International
If you have used our list of suggested targets, then all of this information has been provided (the exposure time will be the same in each filter). Alternatively, you can see if your target object is available in ‘List’ mode.
Click on ‘List’. You will see that the menus appear the same, except for the arrows now in the ‘Target Name’ field.
Image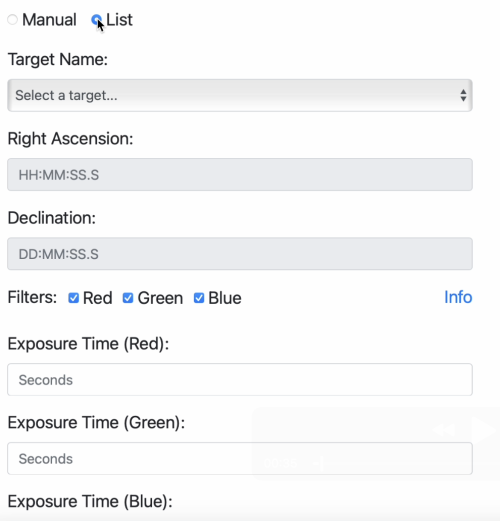 CreditThis work by Las Cumbres Observatory is licensed under Creative Commons Attribution Non Commercial 4.0 International
Selecting this field will now show a list of targets, arranged alphabetically.
Image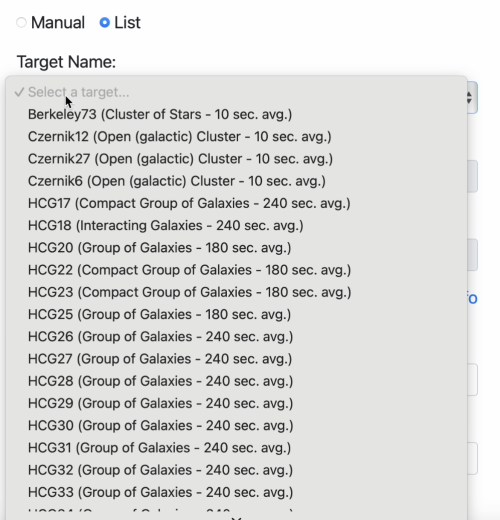 CreditThis work by Las Cumbres Observatory is licensed under Creative Commons Attribution Non Commercial 4.0 International
Search to see if your target is listed or not. If it is, simply click and the other fields will automatically be populated for you (Note: please double-check information – especially exposure times – against our recommendations in the list of suggested targets. As the Real-Time Interface is not hosted by us on our website, the information on it can sometimes be different from ours).
If your target is not listed, you will need to switch back to manual mode and input the details yourself.
- Taking an Image
As soon as your session starts, you will notice your display change.
Image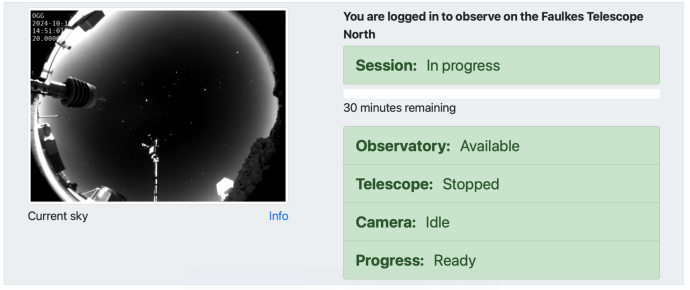 CreditThis work by Las Cumbres Observatory is licensed under Creative Commons Attribution Non Commercial 4.0 International
At this point, go to the target information and click ‘GO!’.
Image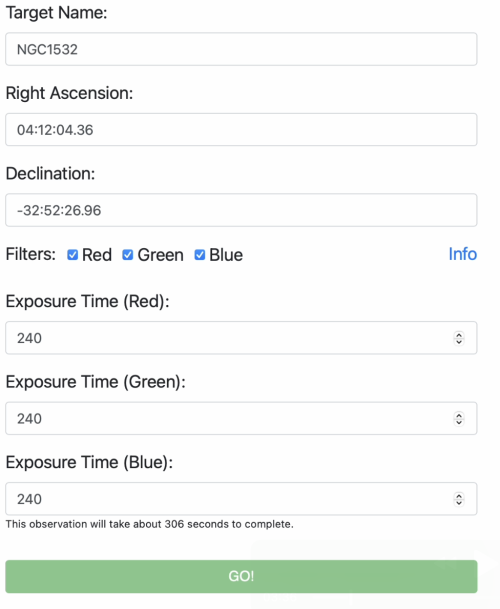 CreditThis work by Las Cumbres Observatory is licensed under Creative Commons Attribution Non Commercial 4.0 International
The display at the top of the page will change again.
Image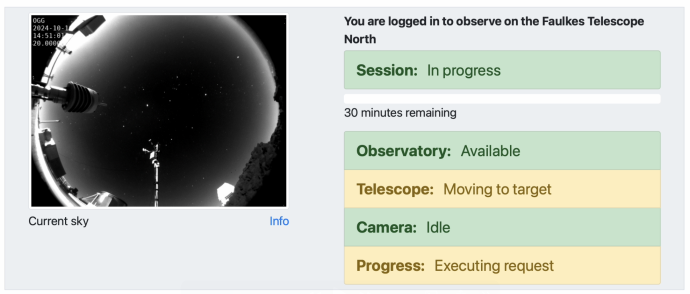 CreditThis work by Las Cumbres Observatory is licensed under Creative Commons Attribution Non Commercial 4.0 International
The telescope will begin to move and find your target. Sometimes, this may take a few minutes, depending on where the telescope was pointing before your session began.Once the telescope has located the target in the sky, it will begin to take an image. You will now see this display:
Image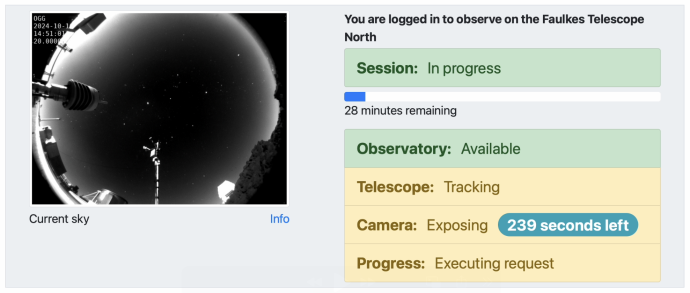 CreditThis work by Las Cumbres Observatory is licensed under Creative Commons Attribution Non Commercial 4.0 International
The telescope is set to ‘Tracking’. This means the telescope will stay fixed on your target, even as it moves across the sky. You may not notice these movements, but if the telescope didn’t track the target, the resulting image would have blurry streaks across it (similar to pictures taken of star trails).
In the ‘Camera’ field, it shows how long is left of your exposure. Whilst you wait, you can input information for your next target in manual mode or see if it’s available in list mode (read the previous section for guidance on this). Just be careful to not accidentally click on the blue ‘CANCEL’ button and stop your request!
When your observation is complete, the ‘GO’ button will become available again. You can then click it and tell the telescope to complete your next observation.
- Viewing Images
Once the camera has taken an image, it will soon become available in the ‘Session Images’ section at the bottom of the page.
Image CreditThis work by Las Cumbres Observatory is licensed under Creative Commons Attribution Non Commercial 4.0 International
You can see that there are two image types: ‘Processed’ and ‘Preview’.
Preview images are ready first. They show the exact image the camera has taken. Processed images will only be available shortly after. Work has been done to remove noise and generally clean up the photo, resulting in a nicer image.
Clicking on the image graphic will allow you to view your images immediately (if this doesn’t work, check to see if any pop-ups are being blocked).
Image CreditThis work by Las Cumbres Observatory is licensed under Creative Commons Attribution Non Commercial 4.0 International
Images will open in a new window.
Image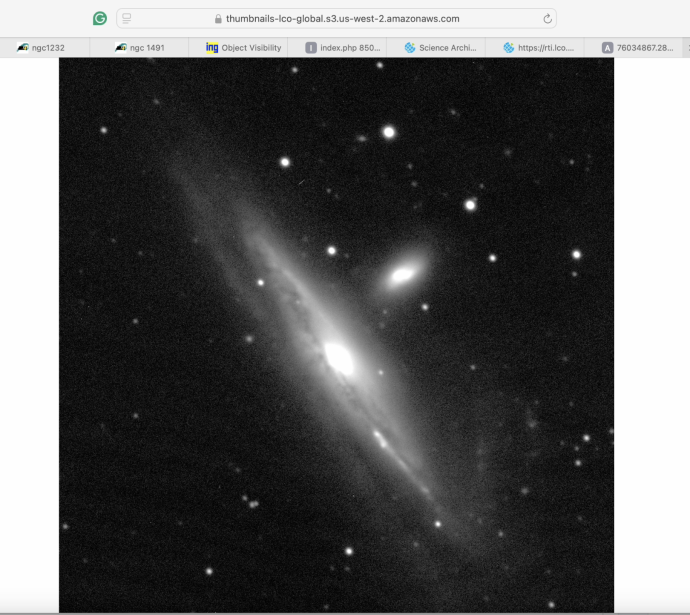 CreditThis work by Las Cumbres Observatory is licensed under Creative Commons Attribution Non Commercial 4.0 International
Images can also be downloaded (in the form of FITS files) for future analysis and opened in special software. We have created software especially for schools to be able to use.
- Explore the Universe
Spend the rest of your session observing whichever targets you choose! The progress bar at the top of the page will tell you how many minutes are remaining.
Note: it may take time for the telescope to move between targets. Please take this into account when planning your session.
- At the end of a Session
As soon as your time has finished, you won’t be able to direct the telescope any longer.
However, you can still stay on the Real-Time Interface for another 15 minutes. This will let you view and download any images you wish.
